Postfix 是一个自由开源的 MTA(邮件传输代理),用于在 Linux 系统上路由或传递电子邮件。在本指南中,你将学习如何在 CentOS 8 上安装和配置 Postfix。

实验室设置:
- 系统:CentOS 8 服务器
- IP 地址:192.168.1.13
- 主机名:server1.crazytechgeek.info(确保域名指向服务器的 IP)
步骤 1)更新系统
第一步是确保系统软件包是最新的。为此,请按如下所示更新系统:
“`
dnf update
“`
继续之前,还请确保不存在其他 MTA(如 Sendmail),因为这将导致与 Postfix 配置冲突。例如,要删除 Sendmail,请运行以下命令:
“`
dnf remove sendmail
“`
步骤 2)设置主机名并更新 /etc/hosts
使用下面的 hostnamectl 命令在系统上设置主机名:
“`
hostnamectl set-hostname server1.crazytechgeek.info
exec bash
“`
此外,你需要在 /etc/hosts 中添加系统的主机名和 IP:
“`
vim /etc/hosts
192.168.1.13 server1.crazytechgeek.info
“`
保存并退出文件。
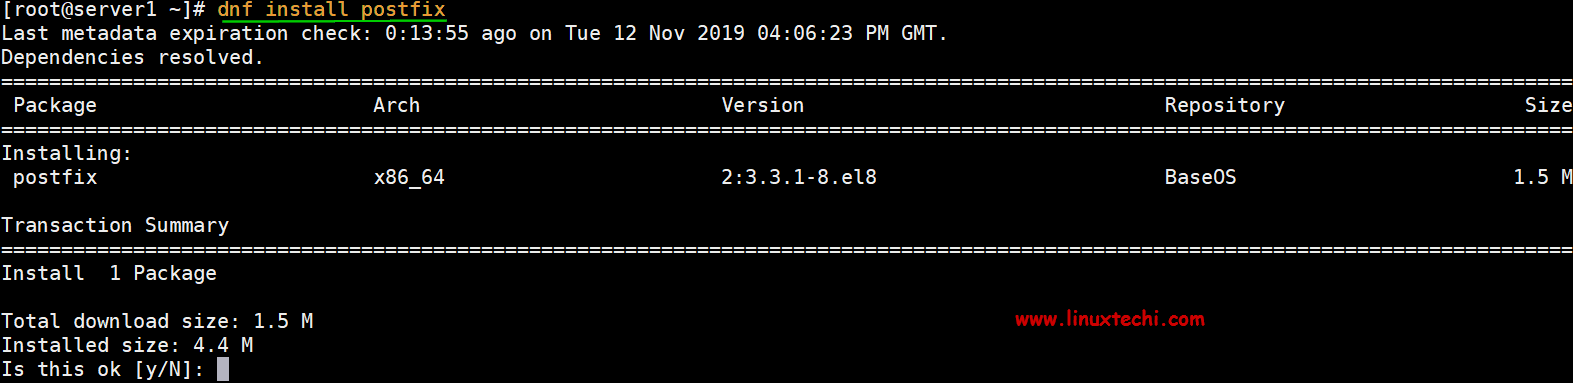
步骤 3)安装 Postfix 邮件服务器
验证系统上没有其他 MTA 在运行后,运行以下命令安装 Postfix:
“`
dnf install postfix
“`
步骤 4)启动并启用 Postfix 服务
成功安装 Postfix 后,运行以下命令启动并启用 Postfix 服务:
“`
systemctl start postfix
systemctl enable postfix
“`
要检查 Postfix 状态,请运行以下 systemctl 命令:
“`
systemctl status postfix
“`
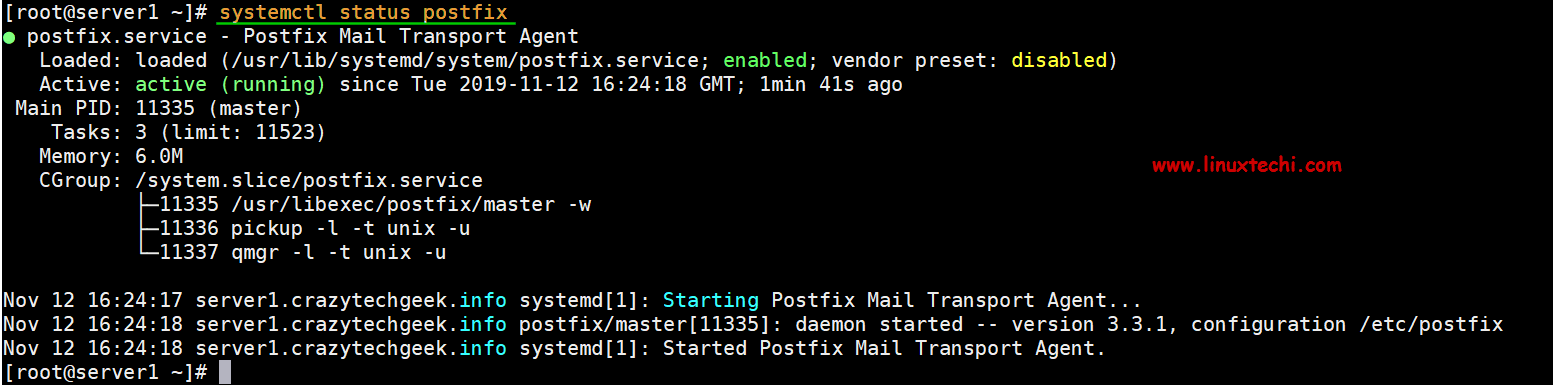
太好了,我们已经验证了 Postfix 已启动并正在运行。接下来,我们将配置 Postfix 从本地发送邮件到我们的服务器。
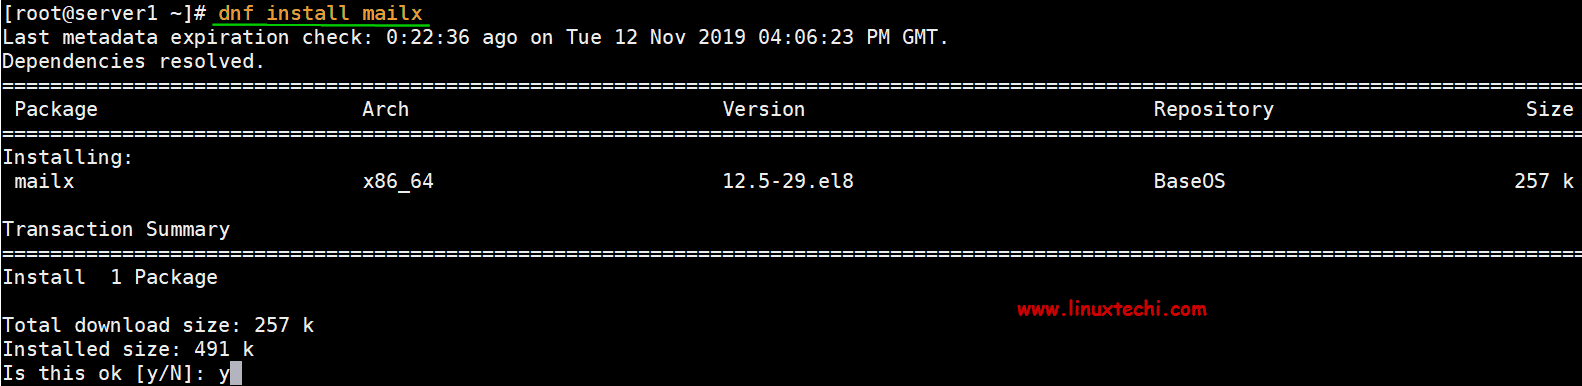
步骤 5)安装 mailx 邮件客户端
在配置 Postfix 服务器之前,我们需要安装 mailx,要安装它,请运行以下命令:
“`
dnf install mailx
“`
步骤 6)配置 Postfix 邮件服务器
Postfix 的配置文件位于 /etc/postfix/main.cf 中。我们需要对配置文件进行一些修改,因此请使用你喜欢的文本编辑器将其打开:
“`
vi /etc/postfix/main.cf
“`
更改以下几行:
“`
myhostname = server1.crazytechgeek.info
mydomain = crazytechgeek.info
myorigin = $mydomain
取消注释并将 inet_interfaces 设置为 all
inet_interfaces = all
更改为 all
inet_protocols = all
注释
mydestination = $myhostname, localhost.$mydomain, localhost
取消注释
mydestination = $myhostname, localhost.$mydomain, localhost, $mydomain
取消注释并添加 IP 范围
mynetworks = 192.168.1.0/24, 127.0.0.0/8
取消注释
home_mailbox = Maildir/
“`
完成后,保存并退出配置文件。重新启动 postfix 服务以使更改生效:
“`
systemctl restart postfix
“`
步骤 7)测试 Postfix 邮件服务器
测试我们的配置是否有效,首先,创建一个测试用户。
“`
useradd postfixuser
passwd postfixuser
“`
接下来,运行以下命令,从本地用户 pkumar 发送邮件到另一个用户 postfixuser。
“`
telnet localhost smtp
或者
telnet localhost 25
“`
如果未安装 telnet 服务,那么可以使用以下命令进行安装:
“`
dnf install telnet -y
“`
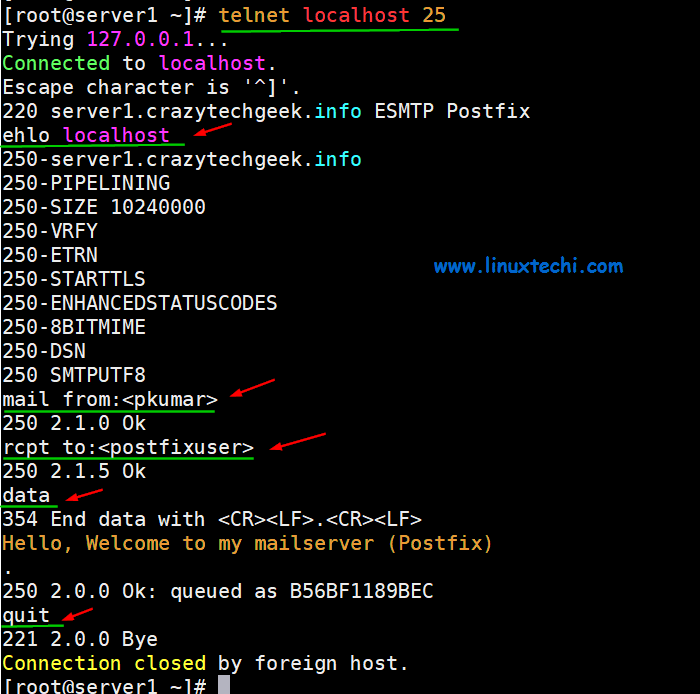
如前所述运行命令时,应获得如下输出:
[root@linuxtechi ~]# telnet localhost 25
Trying 127.0.0.1...
Connected to localhost.
Escape character is '^]'.
220 server1.crazytechgeek.info ESMTP Postfix
上面的结果确认与 postfix 邮件服务器的连接正常。接下来,输入命令:
“`
ehlo localhost
“`
输出看上去像这样:
250-server1.crazytechgeek.info
250-PIPELINING
250-SIZE 10240000
250-VRFY
250-ETRN
250-STARTTLS
250-ENHANCEDSTATUSCODES
250-8BITMIME
250-DSN
250 SMTPUTF8
接下来,运行橙色高亮的命令,例如 mail from、rcpt to、data,最后输入 quit:
mail from:<pkumar>
250 2.1.0 Ok
rcpt to:<postfixuser>
250 2.1.5 Ok
data
354 End data with <CR><LF>.<CR><LF>
Hello, Welcome to my mailserver (Postfix)
.
250 2.0.0 Ok: queued as B56BF1189BEC
quit
221 2.0.0 Bye
Connection closed by foreign host
完成 telnet 命令可从本地用户 pkumar 发送邮件到另一个本地用户 postfixuser,如下所示:
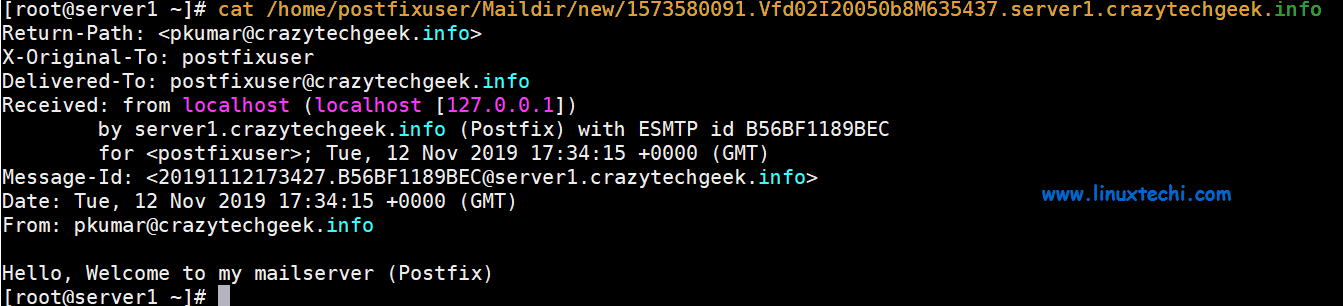
如果一切都按计划进行,那么你应该可以在新用户的家目录中查看发送的邮件:
“`
ls /home/postfixuser/Maildir/new
1573580091.Vfd02I20050b8M635437.server1.crazytechgeek.info
#
“`
要阅读邮件,只需使用 cat 命令,如下所示:
“`
cat /home/postfixuser/Maildir/new/1573580091.Vfd02I20050b8M635437.server1.crazytechgeek.info
“`
Postfix 邮件服务器日志
Postfix 邮件服务器邮件日志保存在文件 /var/log/maillog 中,使用以下命令查看实时日志,
“`
tail -f /var/log/maillog
“`

保护 Postfix 邮件服务器
建议始终确保客户端和 Postfix 服务器之间的通信安全,这可以使用 SSL 证书来实现,它们可以来自受信任的权威机构或自签名证书。在本教程中,我们将使用 openssl 命令生成用于 Postfix 的自签名证书,
我假设 openssl 已经安装在你的系统上,如果未安装,请使用以下 dnf 命令:
“`
dnf install openssl -y
“`
使用下面的 openssl 命令生成私钥和 CSR(证书签名请求):
“`
openssl req -nodes -newkey rsa:2048 -keyout mail.key -out mail.csr
“`

现在,使用以下 openssl 命令生成自签名证书:
“`
openssl x509 -req -days 365 -in mail.csr -signkey mail.key -out mail.crt
Signature ok
subject=C = IN, ST = New Delhi, L = New Delhi, O = IT, OU = IT, CN = server1.crazytechgeek.info, emailAddress = root@linuxtechi
Getting Private key
#
“`
现在将私钥和证书文件复制到 /etc/postfix 目录下:
“`
cp mail.key mail.crt /etc/postfix
“`
在 Postfix 配置文件中更新私钥和证书文件的路径:
“`
vi /etc/postfix/main.cf
………
smtpdusetls = yes
smtpdtlscertfile = /etc/postfix/mail.crt
smtpdtlskeyfile = /etc/postfix/mail.key
smtpdtlssecurity_level = may
………
“`
重启 Postfix 服务以使上述更改生效:
“`
systemctl restart postfix
“`
让我们尝试使用 mailx 客户端将邮件发送到内部本地域和外部域。
从 pkumar 发送内部本地邮件到 postfixuser 中:
“`
echo “test email” | mailx -s “Test email from Postfix MailServer” -r root@linuxtechi root@linuxtechi
“`
使用以下命令检查并阅读邮件:
“`
cd /home/postfixuser/Maildir/new/
ll
total 8
-rw-. 1 postfixuser postfixuser 476 Nov 12 17:34 1573580091.Vfd02I20050b8M635437.server1.crazytechgeek.info
-rw-. 1 postfixuser postfixuser 612 Nov 13 02:40 1573612845.Vfd02I20050bbM466643.server1.crazytechgeek.info
cat 1573612845.Vfd02I20050bbM466643.server1.crazytechgeek.info
“`

从 postfixuser 发送邮件到外部域(root@linuxtechi.com):
“`
echo “External Test email” | mailx -s “Postfix MailServer” -r root@linuxtechi root@linuxtechi
“`
注意:如果你的 IP 没有被任何地方列入黑名单,那么你发送到外部域的邮件将被发送,否则它将被退回,并提示你的 IP 被 spamhaus 之类的数据库列入黑名单。
检查 Postfix 邮件队列
使用 mailq 命令列出队列中的邮件:
“`
mailq
Mail queue is empty
#
“`
完成!我们的 Postfix 配置正常工作了!目前就这样了。我们希望你觉得本教程有见地,并且你可以轻松地设置本地 Postfix 服务器。
via: https://www.linuxtechi.com/install-configure-postfix-mailserver-centos-8/
作者:James Kiarie 选题:lujun9972 译者:geekpi 校对:wxy
主题测试文章,只做测试使用。发布者:eason,转转请注明出处:https://aicodev.cn/2019/11/21/%e5%a6%82%e4%bd%95%e5%9c%a8-centos-8-%e4%b8%8a%e5%ae%89%e8%a3%85%e5%92%8c%e9%85%8d%e7%bd%ae-postfix-%e9%82%ae%e4%bb%b6%e6%9c%8d%e5%8a%a1%e5%99%a8/